
Choosing the right microcontroller for the application is not an easy task. Everyone who has ever tried knows about it. There are many factors that you need to consider. What peripherals are required? Will the device be powered by batteries or the mains? How much GPIOs is needed?
In this article, I will try to help you answer these and other questions. I will not go deep into a theory – that can be found everywhere. It will be a practical guide, without unnecessary and boring things. I assume that you have a general idea of electronics and microcontrollers.
Introduction
When I started dealing with electronics ATmega 8 was the leader on the internet, and magazines (yes, those were the days when magazines were bought:) ). I remember my first projects, which looked like vast spiders of tangled cables.
There were some alternatives, but they were reserved for professionals and manufacturers. The price and the steep entry threshold effectively deterred hobbyists. Today times have changed. Most microcontroller producers have a friendly approach to beginners, who don’t want to spend a big sack of money on expensive programmers and compilers. Also, probably each of them has in its offer an evaluation board to facilitate the learning and prototyping phase.
What is a microcontroller?
I could write here about Harvard’s and von Neumann’s architecture. I could explain what the CISC and RISC instruction list is. I could also tell you about all functions, and make a huge table comparing every detail. But I am convinced that this would be the fastest skipped chapter in history 🙂
Therefore, in order not to bore you to death, I will say it briefly.
The microcontroller is an integrated circuit that is used to control other electronic circuits. The main element is the CPU (Central Processing Unit), which deals with all calculations and execution of all instructions. Besides, there are Flash memory, RAM, and peripheral systems such as: SPI, I2C, UART, USB, DAC, ADC, timers, comparators, and many more.
How to choose the best microcontroller?

Let’s be clear: there is no such thing as “the best microcontroller”. Each of them has strengths and weaknesses. It is up to the designer (aka you) to decide which of the features of a given model are key for your project and which can be omitted. This is a very responsible task, but I know you can handle it, after all, you are reading this article 🙂
I always break down this kind of tasks into small steps. This way it is easier for me to focus on specific aspects of the project. Each subsequent step excludes some microcontrollers. Thanks to this, in the end, I have a small list from which it is easier to choose the right model.
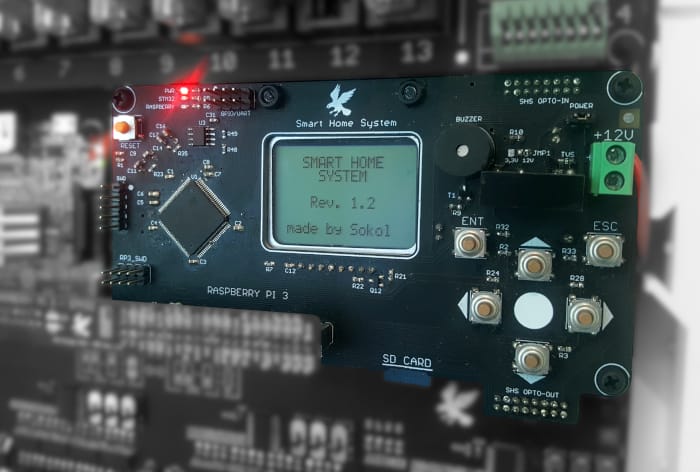
To make this process more real and not just theorize, let’s take to the workshop a real device that I made some time ago. It was the motherboard of my Smart Home System. If you want me to make a separate article about it, let me know in the comment.
Step 1: Make a wish list
To start choosing a microcontroller, you must have some idea on how to implement your project. I like to draw a block diagram that clearly shows the overall concept.
At this point, you don’t have to wonder what interfaces, how much GPIOs, or how much memory you need. Just draw what you want to include in your project.
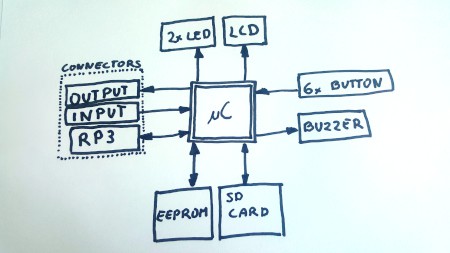
In my case, I would like to have:
- graphical LCD,
- several buttons,
- buzzer,
- microSD card,
- connector for all inputs,
- connector for all outputs,
- connector for Raspberry PI,
- some LEDs.
- EEPROM
Step 2: Determine what peripherals and interfaces you need
At this step, you need to look more closely at each element from the block diagram. A lot of data sheets are waiting for you 🙂 You have to determine what microcontroller must have (e.g. what interface) to control the given element. Some resources can be shared, and others must be independent.
For me it will look like this:
- LCD: I decided on the popular LCD screen used once in Nokia 3310. For that, I need an SPI interface, GPIO for Chip Enable, GPIO for the functional pin, and GPIO for backlight.
- Buttons: I need six buttons, so six GPIO as an INPUT is needed.
- LEDs: Two LEDs = two GIPOs.
- Buzzer: One GPIO configured as an OUTPUT.
- SD Card: I will also use SPI here. It may be shared with LCD. Although this isn’t the fastest way of communication but in my case is more than sufficient.
- EEPROM: I could choose a microcontroller with built-in EEPROM, or use an external one. I decided to use external memory. This solution is more flexible. So I put I2C on the list.
At the end of Step 2 you will know exactly what your microcontroller must have. What interfaces, peripherals, and how many GPIOs.
Step 3: Estimate how much flash memory you need
It takes some experience to choose the right value for flash memory. Many factors affect this. From physical code size to compiler optimization. It is impossible to predict precisely how much memory is needed. Therefore, estimate and add some buffer. Popular values are from a few KB to several MB.
To give you a starting point:
- If your project is relatively simple (without RTOS or Linux) and you don’t plan to use large arrays (e.g. for images to display), then around 32 KB of flash should be sufficient.
- If you want to use some OS or RTOS, or you want to have some small pictures in your memory – use model with at least 512 KB.
- If you are doing a large project with OS and use a large color display for this, then take the largest version.
In my case 512 KB will be ok. I have some monochromic graphic, but it is “bear metal” so no OS on board.
Step 4: Frequency
As in the previous step, it is difficult to clearly determine how fast your microcontroller must run. Typical values are from 16MHz to even 600MHz.
This value determines how many operations per second it will be able to perform. Fortunately, nowadays not everything is done by the CPU. The microcontroller has additional peripherals that operate independently. For example, you can perform ADC measurement, transfer data using DMA to the SPI buffer without consuming processors time.
Remember that this parameter is crucial for current consumption. That is why all “Low Energy” microcontrollers have a relatively low frequency. Therefore, if you are not planning any complicated floating-point operations, or you will not operate the 4k display I recommend not choosing anything from the “HIGH PERFORMANCE” line.
For my Smart Home System, 24 MHz should be ok. I don’t have to take care of energy efficiency and I don’t plan any very complicated calculations. And the display I will use has only 128 by 64 monochrome pixels.
Step 5: What is the power supply method?
Will the device be powered with a battery or mains? If you plan to use batteries, it is good to choose a dedicated microcontroller. Mostly in the name, they have “Low Energy”. They are less efficient than the “classic” versions, but thanks to this, they consume less power. It is also worth paying attention to the energy saving modes offered by the manufacturer. Stand-by modes are standard these days. In the documentation, you can see the power consumption and easily save life time.
Step 6: Cost

As it happens in life, the something has more features and better parameters, the more expensive it is. It is no different in this case. Therefore, it is not worth taking the highest models “just in case”.
The number of devices you plan to make is also substantial. If you are doing only one copy, the difference of even a few dollars is not significant. On the other hand, if you are planning mass production. Then these few dollars difference turns into several thousand dollars.
Step 7: Package
Do you plan to solder all components yourself, or will you order PCB already assembled?
Pay attention to the microcontroller package. Especially if you’re going to solder it yourself. For example, it is very challenging to solder BGA component at home without specialized equipment. I’m not saying it can’t be done. It’s just not easy.
I assemble all my projects by myself. That’s why I prefer QFP / LQFP. They are relatively small, and with a little practice, they can be soldered at home.
Step 8: Availability
I think I don’t need to explain much at this step. In case you plan to make only one device, the matter is simple. If the selected model is available, you can buy it, if not, then no. You can call me Captain Obvious 🙂
However, if you want to make more devices in the future based on the same design, make sure that it isn’t “obsolete”. You can often buy components that are no longer in production. It’s best to check the manufacturer’s website. In such cases, they often write that this model is not recommended for new projects.
Step 9: IDE

Fortunately, probably all major microcontrollers manufacturers have prepared their Integrated Development Environment. This simplifies and significantly speeds up the development process.
Each environment is different, and everyone needs to be learned. If you have already used one of these, it will be easier for you at the very beginning.
However, if you didn’t use any, I recommend the Cube IDE. It is based on the open-source Eclipse compiler (just like a few others :)). And it has a built-in code generator for the initial configuration of peripherals. With a simple modification, you can easily connect the programmer and program directly from the IDE.
Step 10: What is your experience?
This step is a bit related to the previous one. If you already have experience with some family of microcontrollers, then starting the project will be easier for you. Sometimes it’s better to choose something you already know than to learn something else from scratch.
Maybe you have already used several of them. In that case, you definitely have an opinion which is better for you.
I’m programming microcontrollers daily. And I had to deal with most of the popular producers. So, of course, I have my favorites 🙂 That’s why for my project, I aimed at the STM32 family.
If you would like me to make a comparison of different producers and write how to start with each of them, let me know in the comment below.
Step 11: Start prototyping

In the introduction, I wrote that the most microcontroller producers have a friendly approach to beginners. Evaluation Boards are a great example of this. You don’t have to design a PCB, buy a programmer, or solder anything.
It is a wonderful thing if you want to start creating a prototype quickly. You can check your ideas in this way, see how you fit in this environment, whether the microcontroller meets your expectations, or just use it as an educational kit. Producers often provide an example projects for their boards. They simplify the work very much, especially at the beginning. If you want to check, for example, what the implementation of I2C, SPI, or anything else looks like, all you have to do is use a ready-made example and modify it a bit.
You can treat Arduino boards in exactly the same way. They are ideal for testing the ATMega microcontrollers. However, in this case, you can use the Arduino IDE in addition to the official manufacturer environment (MPLAB). But this is a big topic so that I will leave it for a separate article.
HINT
When using the Evaluation Board – Breadboard and Dupont wires are very useful. You can conveniently connect additional components that you want to test. Of course, you will not use SMD components, but these also can often be purchased in a version compatible with the breadboard.
It is possible that you will not find exactly the model you selected in the previous steps. There are so many different types of microcontrollers that if producers had to do evaluation boards for each type, they would go bankrupt 🙂 Just choose the closest one.
At this stage, you can also verify how much flash memory you actually need and how fast the microcontroller must be.
Summary
I chose STM32F105VC for my project. It has 256 KB of flash, the max clock frequency is 72 MHz, it has all the necessary peripherals, and is in the LQFP100 package. Besides, I like STMs..
I hope that I helped you with this difficult task which is choosing the right microcontroller.
The finished motherboard of my Smart Home System looks as follows.
Related Articles

How to program STM32 – The Complete Guide
In this article, I’m gonna show you how to program…

Solar Panel for DIY Projects
Free energy from the sun – sounds great right? It…
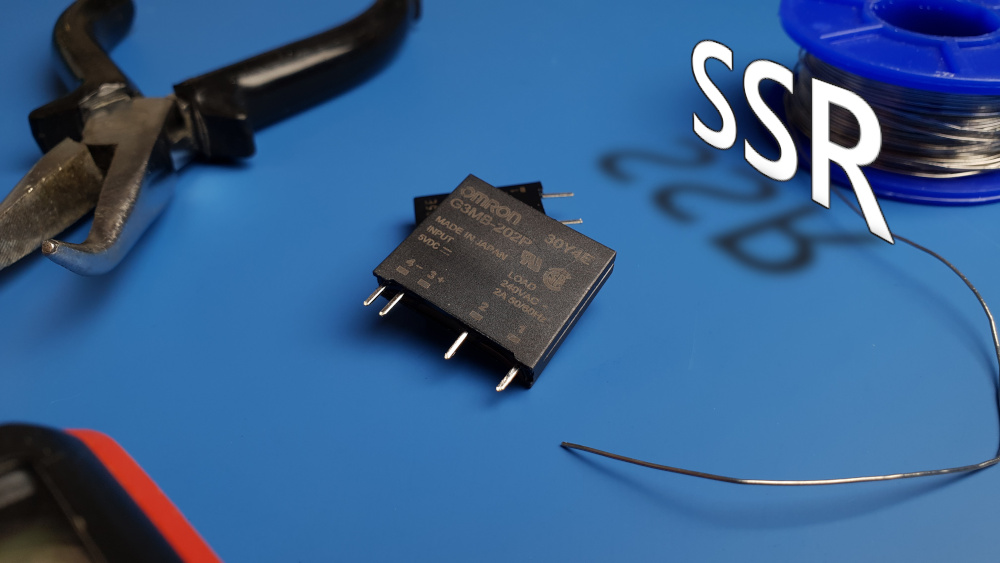
How SSR works? – The Complete Illustrated Guide
A SSR (Solid State Relay) is a semiconductor switch. Using…